
![ApptioCareers-Employee[1]](data:image/svg+xml;base64,PHN2ZyB4bWxucz0iaHR0cDovL3d3dy53My5vcmcvMjAwMC9zdmciIHZpZXdCb3g9IjAgMCAyMjUgMjc1IiB3aWR0aD0iMjI1IiBoZWlnaHQ9IjI3NSIgZGF0YS11PSJodHRwcyUzQSUyRiUyRnd3dy5hcHB0aW8uY29tJTJGd3AtY29udGVudCUyRnVwbG9hZHMlMkZlbGVtZW50b3IlMkZ0aHVtYnMlMkZBcHB0aW9DYXJlZXJzLUVtcGxveWVlMS1xZzVuenB5MHdoaWJtbzZvdmJqNGM3MHh0aTUzdmo1OHM0endwajh0dHMucG5nIiBkYXRhLXc9IjIyNSIgZGF0YS1oPSIyNzUiIGRhdGEtYmlwPSIiPjwvc3ZnPg== "ApptioCareers-Employee[1]")
Kubernetes DevOps Tools
Chapter 4: Traefik vs NGINX
Like this article?
Subscribe to our LinkedIn newsletter to receive more educational content.
Proxies have become an essential networking component and are frequently used with many popular internet services. Proxy servers facilitate requests and responses between end-users and web servers, providing helpful features that augment routing control, privacy, and security. NGINX and Traefik are the most popular tools currently offering proxy functionality. Both solutions can support traditional server-based deployments and containerized application environments, such as Kubernetes. This article will examine both tools in-depth and cover their pros, cons, and distinguishing features.
NGINX vs. Traefik
We have provided a feature comparison table for quick reference below, and this article will give more details as we progress.
| Functionality | NGINX Ingress Controller | Traefik |
|---|---|---|
| Load balancing | ✔ | ✔ |
| Server monitoring | ✔ | ✔ |
| Caching | ✔ | |
| Route Auto-Discovery | ✔ | ✔ |
What is NGINX?
The NGINX project started in 2004 to provide a high-performance web server. Since then, its popularity has sky-rocketed to become the industry market leader, and over 33.5% of all known websites use NGINX. NGINX consistently beats competing solutions like Apache when it comes to speed. NGINX has evolved beyond just a fast web server and provides additional functionality such as load balancing and caching and can act as a reverse proxy.
Thus, NGINX has become a popular intermediary between end-users, servers, and applications. NGINX can also offload networking workloads, such as SSL and compression, improving performance and the overall user experience. These capabilities have made NGINX a go-to solution for powering over 350 million websites, including high-traffic web services such as Dropbox and Netflix.
What is Traefik?
Traefik is a modern, cloud-native HTTP reverse proxy and load balancer. It provides strong support for microservices and integrates with Docker, Kubernetes, Rancher, and Consul. Traefik requires minimal configuration and uses automated service discovery to inject routes to backend services. It accomplishes this by monitoring the API of the underlying orchestration or registry service without the need for manual configuration.
Traefik started life as a cloud-native application proxy in 2016. Since then, it has evolved into a comprehensive routing and load-balancing solution, trusted by organizations such as Mozilla, Expedia, and Bose, with over 2 billion downloads and 500 plus contributors. In addition to its core proxy service, Traefik Labs provides Traefik mesh, a container service mesh, and Traefik Pilot, a centralized management utility for Traefik deployments.
Why Compare Traefik with NGINX?
Pitting a web server against a dedicated proxy solution may seem like an unfair fight. Still, NGINX has matured to the point where it is easily up to operating in a proxy role. By providing ingress services, NGINX also supports cloud-based environments such as Kubernetes. Consequently, NGINX and Traefik have become competing products with overlapping features.
Traefik vs. NGINX
Overall, Traefik presents a more user-friendly experience with its intuitive web interface and auto-discovery features. NGINX is lacking in this regard but provides more fine-grained control. It does so at the cost of convenience, though, as users must set and configure routes manually.
Let’s take a quick look at the advantages and disadvantages of each tool. Below you will find two reference tables that you may return to whenever you need them.
NGINX
| Advantages | Disadvantages |
|---|---|
|
|
Traefik
| Advantages | Disadvantages |
|---|---|
|
|

Configuring Traefik vs. NGINX
In this section, we will demonstrate how Traefik and NGINX are configured to work within both Docker and Kubernetes environments. The basic aim of our deployment is to route traffic between two web servers via a proxy. All examples use Windows 10 running Docker Desktop 4.8.1 and Minikube v1.25.2.
Simple Traefik configuration in Docker
Our first step is to spin up a Traefik container, and we can do this by using the following docker-compose file.
docker-compose.yml
					version: "3"

services:
  traefik-reverse-proxy:
    image: traefik:v2.7
    container_name: traefik-reverse-proxy
    # Enable the Web UI and set provider to docker
    command: --api.insecure=true --providers.docker
    ports:
      - "80:80"
      - "8080:8080" # Web UI Port
    volumes:
      # Listen to the Docker events
      - /var/run/docker.sock:/var/run/docker.sock
    networks:
      - web

networks:
  web:
    name: web
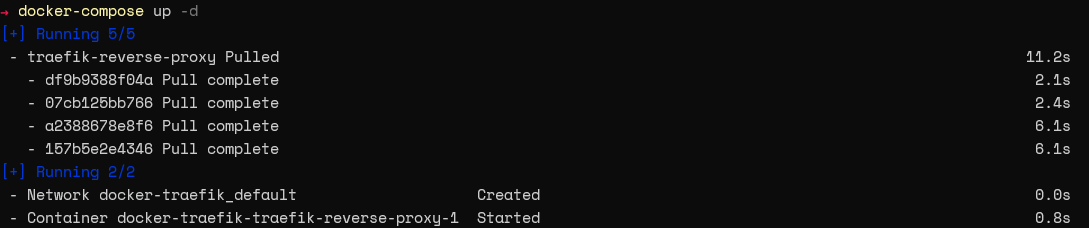
Use the command docker-compose up -d to create the container.
Now, we will create a compose file. This file will include a label that indicates the routing rule for the containers behind the proxy. The label allows Traefik to identify the container and create the necessary routes.
docker-compose.yml
					version: "3"

services:
  nginx:
    image: nginx:latest
    container_name: nginx-webserver
    restart: unless-stopped
    # Label indicating the URL for autodiscovery
    labels:
      - "traefik.http.routers.nginx.rule=Host(`nginx.docker.localhost`)"
    ports:
      - 81:80
    networks:
      - web
  apache:
    image: httpd:latest
    container_name: apache-webserver
    restart: unless-stopped
    # Label indicating the URL for autodiscovery
    labels:
      - "traefik.http.routers.apache.rule=Host(`apache.docker.localhost`)"
    ports:
      - 82:80
    networks:
      - web

networks:
  web:
    name: web
Note – Ensure that Traefik has access to all networks where the containers run. If not, Traefik will be unable to identify the underlying containers automatically.
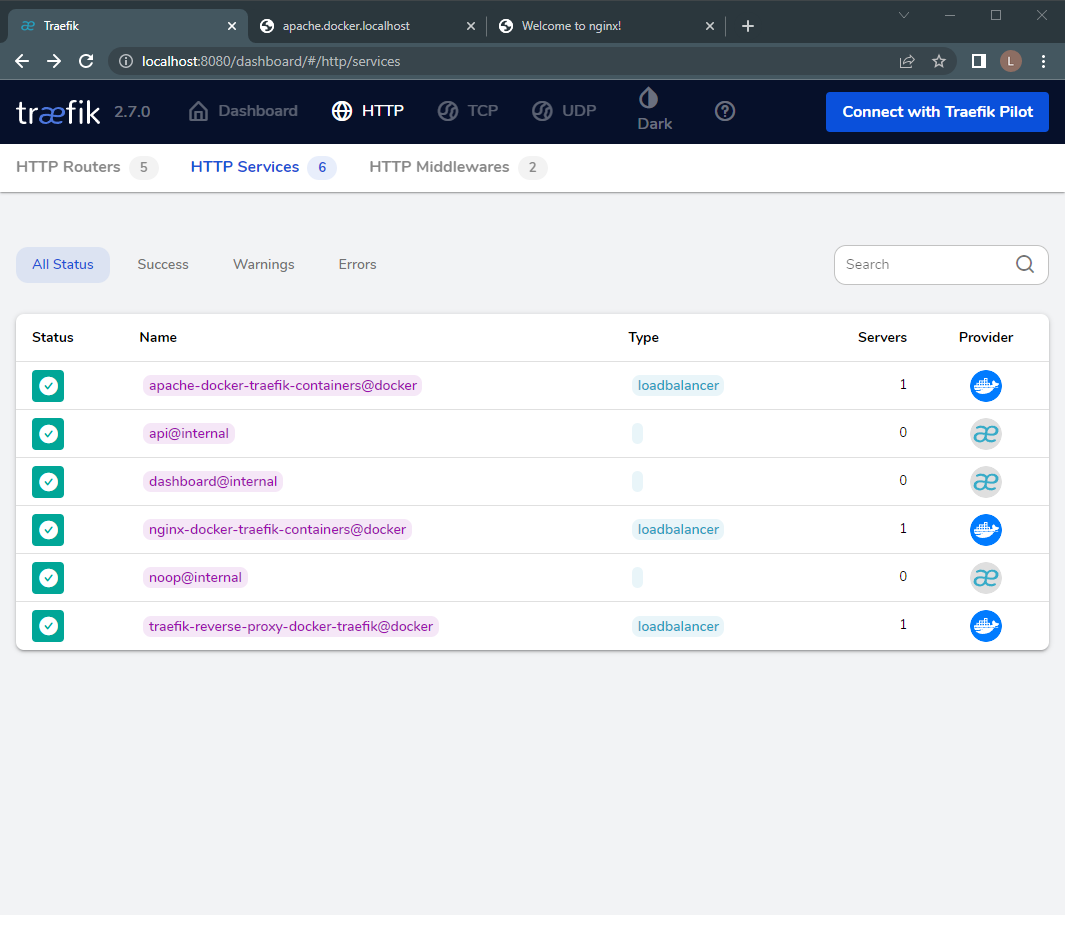
We can verify if the routes were created successfully by logging into Traefik’s UI and looking at the available services. Two routes should now point to Apache and NGINX, as shown below.
Simple NGINX Configuration using Docker
When using NGINX as a proxy, you must set configurations within the NGINX server itself. During deployment, you should pass a custom “nginx.config” file containing the required routes to the NGINX container. Please see the example below.
default.config
					# Default Routing
server {
  listen 80 default_server;

  server_name _;
  root /var/www/html;

  charset UTF-8;

  location / {
    return 404;
  }

  access_log off;
  log_not_found off;
  error_log  /var/log/nginx/error.log error;
}

# Proxy Configuration for NGINX Server
server {
    listen 80;
    server_name nginx.docker.localhost;

    location / {
        proxy_pass http://nginx-webserver;
        proxy_set_header Host $host;
        proxy_set_header X-Real-IP $remote_addr;
        proxy_set_header X-Forwarded-For $proxy_add_x_forwarded_for;
        proxy_set_header X-Forwarded-Proto $scheme;
        proxy_buffering off;
        proxy_request_buffering off;
        proxy_http_version 1.1;
        proxy_intercept_errors on;
    }

    access_log off;
    error_log  /var/log/nginx/error.log error;
}

# Proxy Configuration for Apache Server
server {
    listen 80;
    server_name apache.docker.localhost;

    location / {
        proxy_pass http://apache-webserver;
        proxy_set_header Host $host;
        proxy_set_header X-Real-IP $remote_addr;
        proxy_set_header X-Forwarded-For $proxy_add_x_forwarded_for;
        proxy_set_header X-Forwarded-Proto $scheme;
        proxy_buffering off;
        proxy_request_buffering off;
        proxy_http_version 1.1;
        proxy_intercept_errors on;
    }

    access_log off;
    error_log  /var/log/nginx/error.log error;
}
Override the containers default configuration by pointing this default.conf file to the default.conf file within the container.
docker-compose.yml
					version : "3"
services :
  nginx-proxy:
    image: nginx:latest
    container_name: nginx-proxy
    restart: unless-stopped
    ports:
      - 80:80
    volumes:
      - ./default.conf:/etc/nginx/conf.d/default.conf
    networks:
      - nginx-network
      - apache-network

networks:
  nginx-network:
    name: nginx-network
  apache-network:
    name: apache-network
Now, we need to create the underlying containers. We don’t need to supply any route indicators or labels in this case, since we specified the routing configurations earlier. See the example below.
					version : "3"
services :
  nginx:
    image: nginx:latest
    container_name: nginx-webserver
    restart: unless-stopped
    expose:
      - 80
    networks:
      - nginx-network

  apache:
    image: httpd:latest
    container_name: apache-webserver
    restart: unless-stopped
    expose:
      - 80
    networks:
      - apache-network

networks:
  nginx-network:
    name: nginx-network
  apache-network:
    name: apache-network

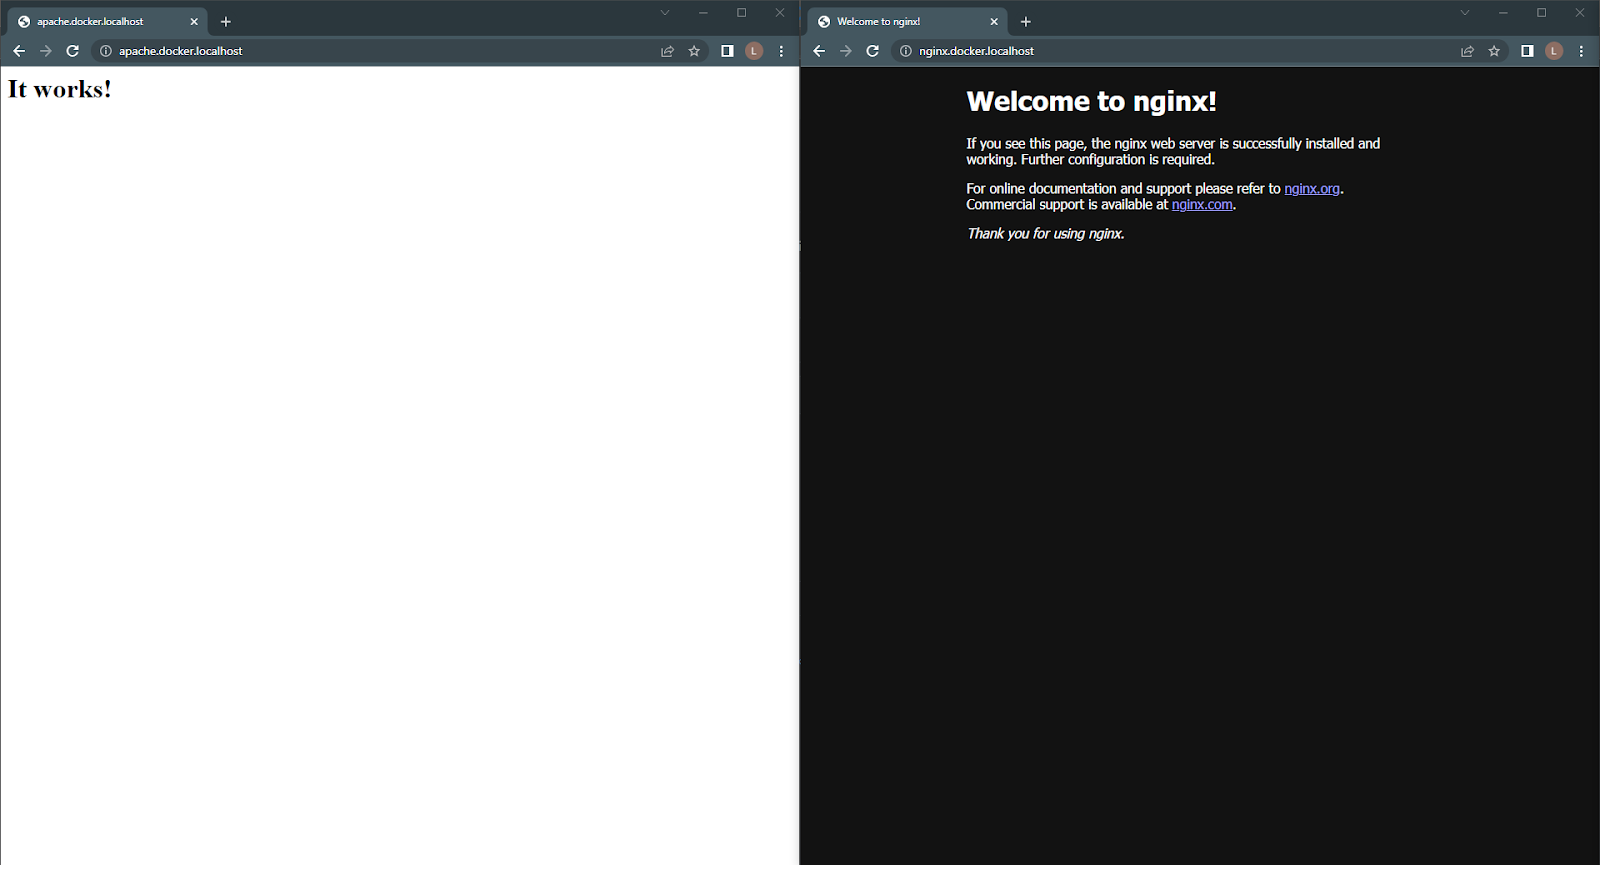
To test the proxy configuration, just enter the specified URLs into a browser. The routes will be triggered and direct you to the correct destination.
Using NGINX and Traefik to manage Kubernetes Ingress
Before configuring an ingress service, we need our backend services to provide connectivity within the server. We will use the following deployment to create two Pods that run NGINX and Apache, and two services that provide connectivity to the Pods.
backend.yml
					# NGINX Pod
apiVersion: apps/v1
kind: Deployment
metadata:
  name: nginx-webserver
spec:
  selector:
    matchLabels:
      run: nginx-webserver
  replicas: 1
  template:
    metadata:
      labels:
        run: nginx-webserver
    spec:
      containers:
      - name: nginx-webserver
        image: nginx
        ports:
        - containerPort: 80
        resources:
          requests:
            memory: "64Mi"
            cpu: "250m"
          limits:
            memory: "128Mi"
            cpu: "500m"
---
# Apache Pod
apiVersion: apps/v1
kind: Deployment
metadata:
  name: apache-webserver
spec:
  selector:
    matchLabels:
      run: apache-webserver
  replicas: 1
  template:
    metadata:
      labels:
        run: apache-webserver
    spec:
      containers:
      - name: apache-webserver
        image: httpd
        ports:
        - containerPort: 80
        resources:
          requests:
            memory: "64Mi"
            cpu: "250m"
          limits:
            memory: "128Mi"
            cpu: "500m"
---
# NGINX Service
apiVersion: v1
kind: Service
metadata:
  name: nginx-webserver
  labels:
    run: nginx-webserver
spec:
  ports:
  - port: 80
    protocol: TCP
  selector:
    run: nginx-webserver
---
# Apache Service
apiVersion: v1
kind: Service
metadata:
  name: apache-webserver
  labels:
    run: apache-webserver
spec:
  ports:
  - port: 80
    protocol: TCP
  selector:
    run: apache-webserver
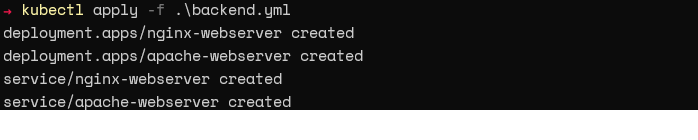
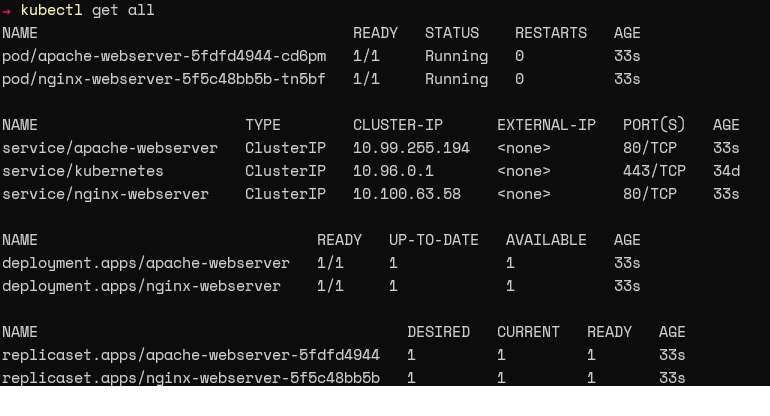
Apply the configuration by using the “kubectl apply” command.
Verify that the resource was created by running the “kubectl get all” command.
NGINX Ingress Configuration
The Minikube ingress add-on automatically configures the NGINX Ingress controller within the local Kubernetes cluster. First, enable the addon using the command below.
minikube addons enable ingress.

We will now create a name-based virtual host ingress, pointing to our previously created services, as shown below.
nginx-ingress.yml
					apiVersion: networking.k8s.io/v1
kind: Ingress
metadata:
  name: nginx-ingress
  annotations:
    nginx.ingress.kubernetes.io/rewrite-target: /
spec:
  rules:
    # Point to NGINX Service
    - host: nginx.k8s.localhost.com
      http:
        paths:
          - path: /
            pathType: Prefix
            backend:
              service:
                name: nginx-webserver
                port:
                  number: 80
    # Point to Apache Service
    - host: apache.k8s.localhost.com
      http:
        paths:
          - path: /
            pathType: Prefix
            backend:
              service:
                name: apache-webserver
                port:
                  number: 80
Finally, apply the ingress configuration above by using the following commands.
					kubectl apply -f .\nginx-ingress.yml
kubectl get ingress

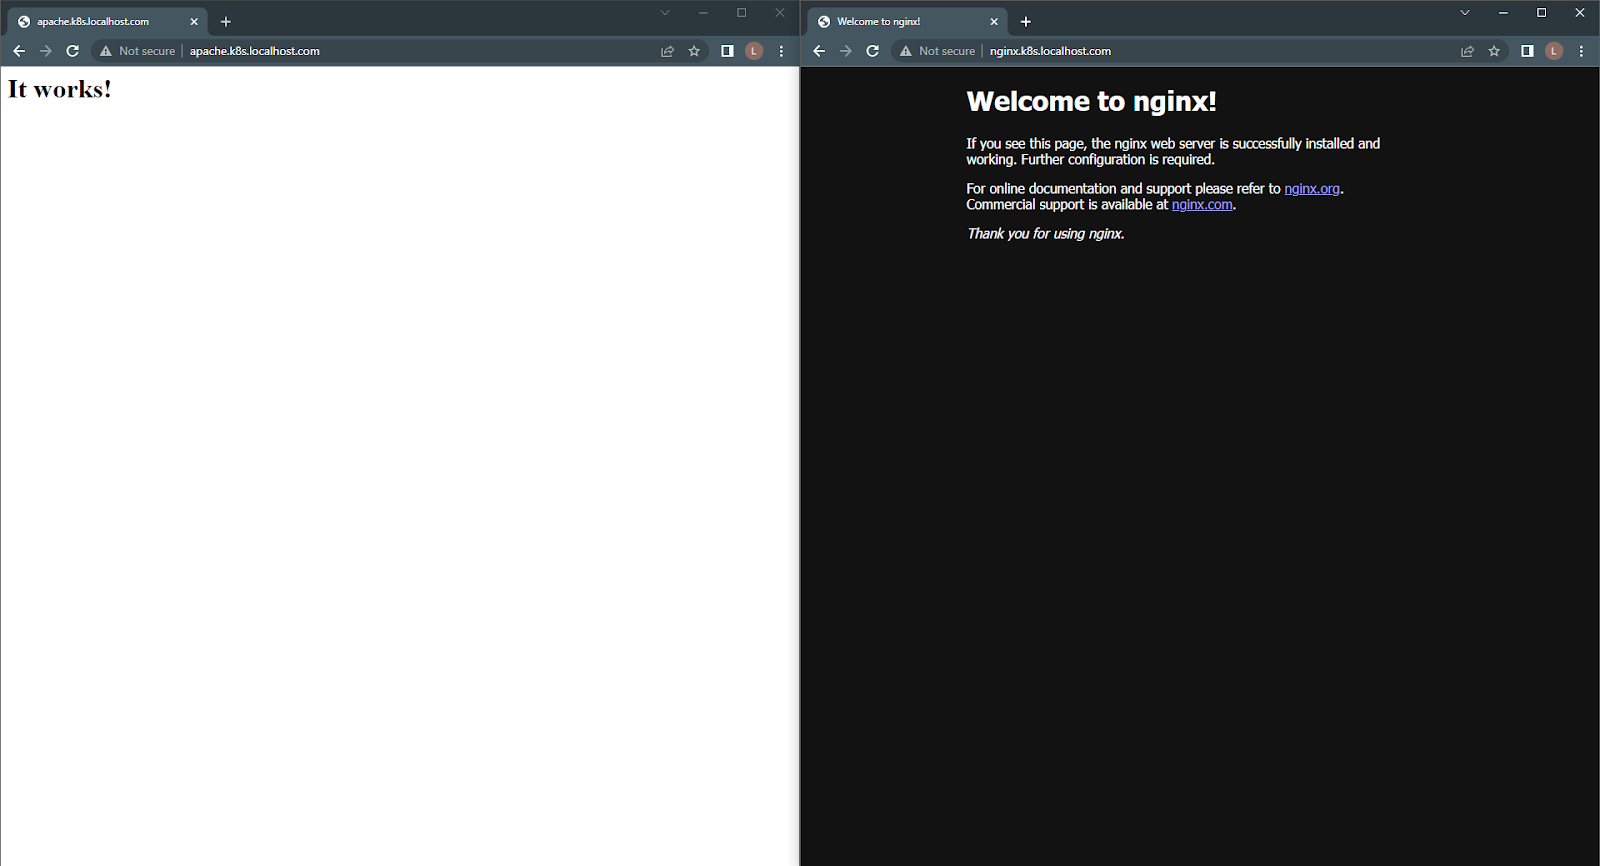
When you follow the configured URLs, you will be directed to the relevant Pods.
Traefik Ingress Configuration
The easiest way to install Traefik in Kubernetes is via a Helm Chart. Just run the following commands.
					helm repo add traefik https://helm.traefik.io/traefik
helm repo update
helm install traefik traefik/traefik.fffff
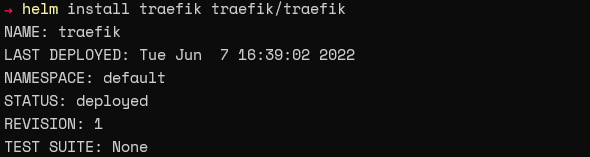
Next, verify that the Helm chart creates the required Pods and services as expected.

The next step is to create the ingress configuration for Traefik. The “router.entrypoint” annotation ensures that the Ingress only listens to the Traefik service created by the Helm chart.
					apiVersion: networking.k8s.io/v1
kind: Ingress
metadata:
  name: traefik-ingress
  annotations:
    traefik.ingress.kubernetes.io/router.entrypoints: web
spec:
  rules:
    # Point to NGINX Service
    - host: nginx.k8s.localhost.com
      http:
        paths:
          - path: /
            pathType: Prefix
            backend:
              service:
                name: nginx-webserver
                port:
                  number: 80
    # Point to Apache Service
    - host: apache.k8s.localhost.com
      http:
        paths:
          - path: /
            pathType: Prefix
            backend:
              service:
                name: apache-webserver
                port:
                  number: 80
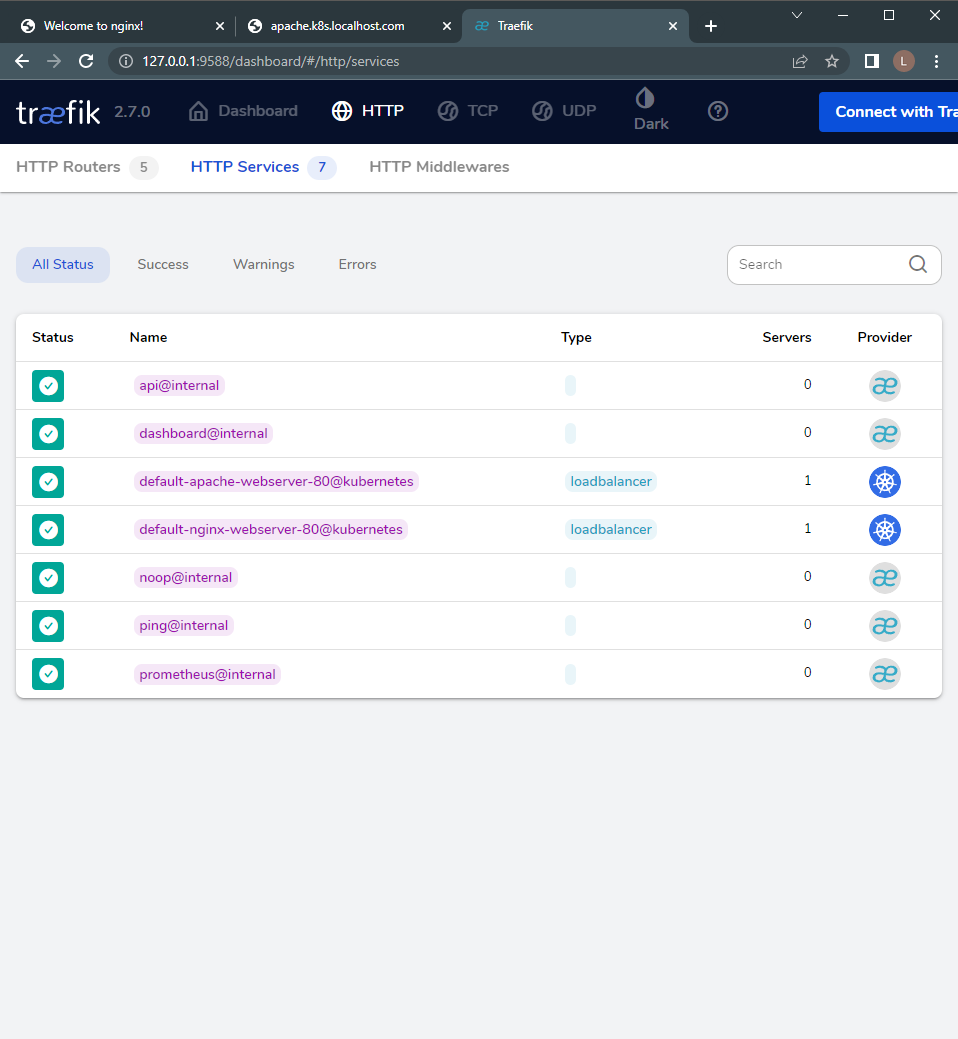
The following command exposes the Traefik web UI.
kubectl port-forward $(kubectl get pods --selector "app.kubernetes.io/name=traefik" --output=name) 9588:9000

By looking at the HTTP services within the dashboard, you can see that there are two ingress routes. These routes are configured for two services in Kubernetes, indicating that the Ingress configuration is now complete.
NGINX and Traefik limitations
During this article, we have illustrated that both NGINX and Traefik provide comparable functionality. However, neither tool is perfect, and there are some limitations that we wish to draw your attention to below:
- NGINX requires users to configure routing rules manually
- Traefik ingress controller deployment is relatively complex
- NGINX consumes more resources than Traefik
- NGINX has no native web UI (although projects like NGINX Proxy Manager aim to bridge this gap)
Conclusion
During this article, we learned about the origins and capabilities of both NGINX and Traefik. We also covered how they function as proxy servers and how to configure them via a few practical examples. Both NGINX and Traefik are market leaders, playing their role in the explosive growth of containerized environments. Traefik is a cloud-native and user-friendly tool that is easy to deploy into existing infrastructure. Conversely, NGINX provides proxy services that are heavily customizable and flexible. While both solutions offer capable proxy services, NGINX is the more well-rounded option with its ability to cater to other application needs such as caching, hosting, and load balancing.
