
![ApptioCareers-Employee[1]](data:image/svg+xml;base64,PHN2ZyB4bWxucz0iaHR0cDovL3d3dy53My5vcmcvMjAwMC9zdmciIHZpZXdCb3g9IjAgMCAyMjUgMjc1IiB3aWR0aD0iMjI1IiBoZWlnaHQ9IjI3NSIgZGF0YS11PSJodHRwcyUzQSUyRiUyRnd3dy5hcHB0aW8uY29tJTJGd3AtY29udGVudCUyRnVwbG9hZHMlMkZlbGVtZW50b3IlMkZ0aHVtYnMlMkZBcHB0aW9DYXJlZXJzLUVtcGxveWVlMS1xZzVuenB5MHdoaWJtbzZvdmJqNGM3MHh0aTUzdmo1OHM0endwajh0dHMucG5nIiBkYXRhLXc9IjIyNSIgZGF0YS1oPSIyNzUiIGRhdGEtYmlwPSIiPjwvc3ZnPg== "ApptioCareers-Employee[1]")
Kubernetes Best Practices
Chapter 6: Backups - Complete guide with Velero Tutorial
Like this article?
Subscribe to our LinkedIn newsletter to receive more educational content.
Kubernetes eases the application deployment process and makes it efficient. However, administrators must ensure availability and reliability for the clusters so the application workloads run without adversely impacting the end users. A well-thought-out Kubernetes backup strategy becomes crucial when some or all of the cluster resources might fail. Otherwise, unexpected failures can lead to severe consequences, such as reduced application availability, adverse impact on end-users, and financial losses.
It is vital to implement the correct backup methods for your Kubernetes clusters. This article covers general guidelines about Kubernetes backup plans, strategies, and available tools, focusing on an open-source tool called Velero. We also include guidelines on the best backup practices, how to execute backups in production environments, and how to restore the backups in case of cluster failures.
Let’s dive in.
Summary of key concepts
| Kubernetes Backups | |
|---|---|
| Concept | Summary |
| Kubernetes backup principle | It goes beyond data preservation to include Kubernetes objects, configurations, volumes, and more. |
| Kubernetes resources you should back up |
|
| Kubernetes backup tools | Velero open source tool or alternatives like Kasten K10 and TrilioVault. |
| Best practices for Kubernetes backup |
|
Fundamentals of effective Kubernetes backup strategies
An effective backup strategy for Kubernetes goes beyond data preservation. It encompasses a comprehensive approach to disaster recovery, data migration, and data protection, ensuring the resilience and availability of your applications under all circumstances.
Disaster recovery
In the context of Kubernetes, disaster recovery goes beyond just having backups of your data. It includes a comprehensive strategy ensuring quick and seamless retrieval of your application data and Kubernetes objects and configurations, such as deployments, services, and persistent volume claims. It is about minimizing the recovery time (RTO) and recovery point objectives (RPO).
If a Kubernetes node fails, it’s not just the data in the persistent volumes of that node that’s at stake. For instance, affected components could include:
- Pods running on the node.
- Services directing traffic to pods.
- Ingress rules associated with those services.
A well-planned disaster recovery strategy ensures that you have backups of all these Kubernetes objects and automates restoring them in a new or existing cluster to ensure a quick recovery.
Data migration
When migrating data in Kubernetes, you’re not just moving raw data from one place to another. You’re also migrating Kubernetes objects and configurations that manage and interact with that data. For instance, this includes
- Persistent volumes that store the data.
- Persistent volume claims that provide access.
- Deployments that run applications using that data.
Migrating these objects between clusters or cloud providers is complex due to differences in storage classes, access modes, and other configuration details. An effective backup strategy ensures that details are preserved in the backup and correctly applied during the restore process to ensure seamless data migration.
Data protection
In Kubernetes, protecting your data extends beyond preventing data loss. It requires backing up the persistent volumes that store your data and the deployments, services, and other Kubernetes objects that use it.
For instance, consider a scenario where a Deployment configuration is accidentally deleted. In such a situation, all Pods managed by this Deployment will also be deleted, leading to service downtime. Therefore, backing up all pertinent Kubernetes objects and the data ensures your applications’ integrity and availability. By doing so, you can protect against disruptions and recover efficiently when mishaps occur.
Kubernetes resources you should backup
You should backup your Kubernetes workloads, services, networking, config, storage, and cluster resources. Each of these components plays a crucial role in your Kubernetes environment.
Workloads
Workloads like Deployments, StatefulSets, DaemonSets, and ReplicaSets manage your applications and maintain the desired state and scale. They encapsulate the configurations required for the successful deployment of your pods. By backing them, you can quickly redeploy your applications and reduce the risk of service disruptions. Moreover, the backup of these resources is critical if you plan to roll out your application to a new Kubernetes cluster.
Jobs and Cronjobs
In Kubernetes, Jobs and CronJobs represent one-off and scheduled tasks, respectively. Backing up their configurations ensures:
- Continuity of the functions across cluster disruptions.
- Swift recreation of critical batch jobs if necessary.
This is particularly important in data processing or machine learning scenarios, where these jobs might form crucial parts of larger pipelines.
Services & Networking
Services in Kubernetes provide a consistent way of accessing your applications. They abstract away the complexity of managing pod lifecycles and provide stable network access. Backing up your service configurations ensures that your networking setup remains consistent and minimizes disaster impact on your end-users.
Ingress
Ingress rules define how incoming traffic should be routed to services within your cluster. These rules, especially in complex microservices setups, can be intricate. Having a backup of your Ingress configurations saves you from the arduous task of manually recreating them in case of a loss. You can ensure the external access patterns to your services remain consistent.
NetworkPolicies
NetworkPolicies govern the permissible communication paths between services within your cluster. Backing them up is crucial to preserve your network’s security posture. It ensures that your services continue interacting and maintain the same access controls and traffic flow rules even after a disruption.
Config
ConfigMaps and Secrets hold non-confidential and confidential configuration data that applications require to run correctly. By backing them up, you ensure the configurations and sensitive information (like credentials) your applications depend on are always available. You can use built-in backup methods if you use external sources like AWS SSM Parameters, AWS Secrets, or Hashicorp Vault to manage the configuration and secrets.
Storage
PersistentVolumeClaims represent your pod’s storage requests. A backup of your PVs ensures that Kubernetes appropriately reprovisions any storage attached to your workloads if a disaster occurs. It preserves the storage configurations that your applications rely on, ensuring data consistency.
Cluster resources
Kubernetes Namespaces segregates cluster resources among multiple users, applications, or environments. Backing up Namespace information helps you recreate your cluster’s exact organizational and access control boundaries after a disaster.
RBAC settings
RBAC settings like Roles and RoleBindings in Kubernetes dictate who can do what within a namespace or a cluster. These rules are vital for maintaining access controls within your cluster. Backing them ensures you can quickly restore your cluster’s correct permissions and access controls.
Velero is an open-source tool that can back up, recover, and migrate Kubernetes cluster resources and persistent volumes. It utilizes Custom Resource Definitions (CRDs) to execute various commands in the cluster.
CRDs are an extension of the Kubernetes API that allows you to create new custom resources and define the desired application functionality within the cluster. In the context of Velero, these CRDs define and control the backup and restoration processes. For instance, when you want to create a backup of your cluster, a backup CRD is submitted to the cluster. This CRD provides instructions to the Kubernetes API, defining what needs to be backed up.
Creating these manually can be challenging, so the Velero team has developed a user-friendly CLI for performing backups and restores.
Key features of Velero include:
- Backup and restore all cluster resources (with their associated metadata), and restore them.
- Migrate cluster resources to other clusters, providing a way to recover from infrastructure loss.
- Regularly back up your Kubernetes objects and PVs and replicate them to a secondary cluster for disaster recovery.
Alternatives to Velero
Several other tools provide Kubernetes backup functionality.
Kasten K10 is a purpose-built data management platform for Kubernetes, providing enterprise operations teams with an easy-to-use, scalable, and secure system for backup/restore disaster recovery and mobility of Kubernetes applications.
TrilioVault for Kubernetes is a native data protection platform offering backup, recovery, cloning, and migration capabilities.
Portworx PX-Backup is a multi-cluster Kubernetes backup solution for applications and their data, supporting backup and restoration of applications and their data across different cloud providers.
These tools have unique features and may better suit specific use cases or environments. Evaluate a few options to find the best fit for your needs.

How to use Velero for Kubernetes backup
For this demo, we are using Velero with Amazon Elastic Kubernetes Service (AWS EKS) and other AWS resources like S3 and EBS Volumes. However, Velero also works on other managed Kubernetes options, such as Azure Kubernetes Service (AKS) and Google Kubernetes Engine (GKE).
Pre-requisites
To follow this tutorial, you’ll need the below tools installed locally:
- awscli (Installed and configured with AWS credentials)
- kubectl
- helm
- eksctl (For deploying the EKS cluster)
Running a managed Kubernetes cluster in cloud vendors incurs hourly costs. We keep costs as low as possible in this demo by using AWS Spot instances and cleaning the resources once the demo is completed.
Deploying AWS EKS Cluster
We use eksctl tool to create an AWS EKS cluster. Start by writing a cluster.yaml file with the below configuration.
					apiVersion: eksctl.io/v1alpha5
kind: ClusterConfig

metadata:
  name: velero-backup-demo
  region: us-east-1

iam:
  withOIDC: true

managedNodeGroups:
  - name: node-group-1-spot-instances
    instanceTypes: ["t3.small", "t3.medium"]
    spot: true
    desiredCapacity: 3
    volumeSize: 8

addons:
  - name: vpc-cni
  - name: coredns
  - name: aws-ebs-csi-driver
  - name: kube-proxy
The file defines the configuration for creating an AWS EKS cluster named velero-backup-demo in the us-east-1 region. It also includes a managed node group called node-group-1-spot-instances consisting of spot instances, a cost-effective option for running your workloads. The node group uses a mix of t3.small and t3.medium instance types, with a desired capacity of three nodes and a volume size of 8 GB for each node.
The addons section lists the necessary components for the cluster, such as
- VPC CNI plugin
- CoreDNS for service discovery
- AWS EBS CSI driver for dynamic provisioning of EBS volumes
- Kube-proxy for managing network traffic between pods and services
To apply the configuration, execute the command:
> eksctl create cluster -f cluster.yaml
This will create an EKS cluster with a node group consisting of a single node in the us-east-1 region. Once the cluster is ready, you should see an output similar to the one below.
EKS cluster "velero-backup-demo" in "us-east-1" region is ready.
> aws eks --region us-east-1 update-kubeconfig --name velero-backup-demo
To confirm the cluster access, execute the command to get the Pods from the default namespace.
> kubectl get pods
Creating required AWS resources
First, let’s define a few variables we will use while creating AWS resources.
					export BUCKET=velero-backup-demo-zfgwq
export REGION=us-east-1
export CLUSTER=velero-backup-demo
export ACCOUNT=$(aws sts get-caller-identity --query Account --output text)
These variables define the S3 bucket name (randomize the last five characters to avoid S3 name conflicts), AWS region, EKS Cluster name, and AWS account ID.
In this demo, we also use an AWS S3 bucket to store the backup data from Velero. To create the S3 bucket, execute the below command.
					> aws s3api create-bucket \
    --bucket $BUCKET \
    --region $REGION
{
    "Location": "/velero-backup-demo-zfgwq"
}
Next, grant the required IAM permissions to allow Valero to interact with S3 and other EC2 resources.
					cat > velero-access-policy.json <<EOF
    {
    "Version": "2012-10-17",
    "Statement": [
        {
            "Effect": "Allow",
            "Action": [
                "ec2:DescribeVolumes",
                "ec2:DescribeSnapshots",
                "ec2:CreateTags",
                "ec2:CreateVolume",
                "ec2:CreateSnapshot",
                "ec2:DeleteSnapshot"
            ],
            "Resource": "*"
        },
        {
            "Effect": "Allow",
            "Action": [
                "s3:GetObject",
                "s3:DeleteObject",
                "s3:PutObject",
                "s3:AbortMultipartUpload",
                "s3:ListMultipartUploadParts"
            ],
            "Resource": [
                "arn:aws:s3:::${BUCKET}/*"
            ]
        },
        {
            "Effect": "Allow",
            "Action": [
                "s3:ListBucket"
            ],
            "Resource": [
                "arn:aws:s3:::${BUCKET}"
            ]
        }
    ]
}
EOF

> aws iam create-policy \
    --policy-name VeleroDemoAccessPolicy \
    --policy-document file://velero-access-policy.json
					> eksctl create iamserviceaccount \
--cluster=$CLUSTER \
--name=velero-backup-demo-server \
--namespace=velero \
--role-name=eks-velero-backup-demo \
--role-only \
--attach-policy-arn=arn:aws:iam::$ACCOUNT:policy/VeleroDemoAccessPolicy \
--approve
Installing Velero
To install Velero, you can follow the specific instructions for your operating system. The installation guide can be found here. We have explained the process for Linux systems below.
- We create a values.yaml file that contains the required configuration. Run the below command.
					cat > values.yaml <<EOF
    configuration:
    backupStorageLocation:
    - bucket: ${BUCKET}
    provider: aws
    config:
    region: ${REGION}
    volumeSnapshotLocation:
    - provider: aws
    config:
    region: ${REGION}

    credentials:
    useSecret: false

    image:
    repository: velero/velero
  tag: v1.11.0
  pullPolicy: IfNotPresent

initContainers:
  - name: velero-plugin-for-csi
    image: velero/velero-plugin-for-csi:v0.5.0
    imagePullPolicy: IfNotPresent
    volumeMounts:
      - mountPath: /target
        name: plugins
  - name: velero-plugin-for-aws
    image: velero/velero-plugin-for-aws:v1.7.0
    imagePullPolicy: IfNotPresent
    volumeMounts:
      - mountPath: /target
        name: plugins

serviceAccount:
  server:
    create: true
    name: velero-backup-demo-server
    annotations:
      eks.amazonaws.com/role-arn: "arn:aws:iam::979450158315:role/eks-velero-backup-demo"
EOF
Next, execute the below commands to install Velero using the helm chart.
					> helm repo add vmware-tanzu https://vmware-tanzu.github.io/helm-charts

> helm repo update

> helm install velero vmware-tanzu/velero \
    --create-namespace \
    --namespace velero \
    -f values.yaml
You can verify that the Velero server was successfully installed by running the below command:
					> kubectl get pods -n velero
NAME                      READY   STATUS    RESTARTS   AGE
velero-86d59ddb77-m7brp   1/1     Running   0          54m
We recommend you review the Velero documentation for more advanced features and use cases like scheduling a backup, excluding specific items from the backup, and backup and restore Hooks.
Backup and restore a test application
We will deploy the Ghost application helm chart. Ghost uses MySQL as a database, which we store in an EBS volume that Velero snapshots for backup.
To install the Ghost helm chart, execute the below commands in series.
					> helm install ghost bitnami/ghost \
    --create-namespace \
    --namespace ghost

> export APP_HOST=$(kubectl get svc --namespace ghost ghost --template "{{ range (index .status.loadBalancer.ingress 0) }}{{ . }}{{ end }}")

> export GHOST_PASSWORD=$(kubectl get secret --namespace "ghost" ghost -o jsonpath="{.data.ghost-password}" | base64 --decode)

> export mysql_ROOT_PASSWORD=$(kubectl get secret --namespace "ghost" ghost-mysql -o jsonpath="{.data.mysql-root-password}" | base64 --decode)

> export mysql_PASSWORD=$(kubectl get secret --namespace "ghost" ghost-mysql -o jsonpath="{.data.mysql-password}" | base64 --decode)

> helm upgrade ghost bitnami/ghost \
  --namespace ghost \
  --set service.type=LoadBalancer \
  --set ghostHost=$APP_HOST \
  --set ghostPassword=$GHOST_PASSWORD \
  --set mysql.auth.rootPassword=$mysql_ROOT_PASSWORD \
  --set mysql.auth.password=$mysql_PASSWORD
Once the upgrade command is successful, it outputs a Ghost access URL and credentials for the Ghost admin panel. Make a note of those. You can verify that the installation was successful by executing the below command:
					> kubectl get pods -n ghost
NAME                   READY   STATUS    RESTARTS   AGE
ghost-9b4f89d8-mm9xh   1/1     Running   0          52m
ghost-mysql-0          1/1     Running   0          52m
Once the pods are in a running state, we can browse the Ghost Admin panel by visiting the URL ending with /ghost and logging in with the above credentials.
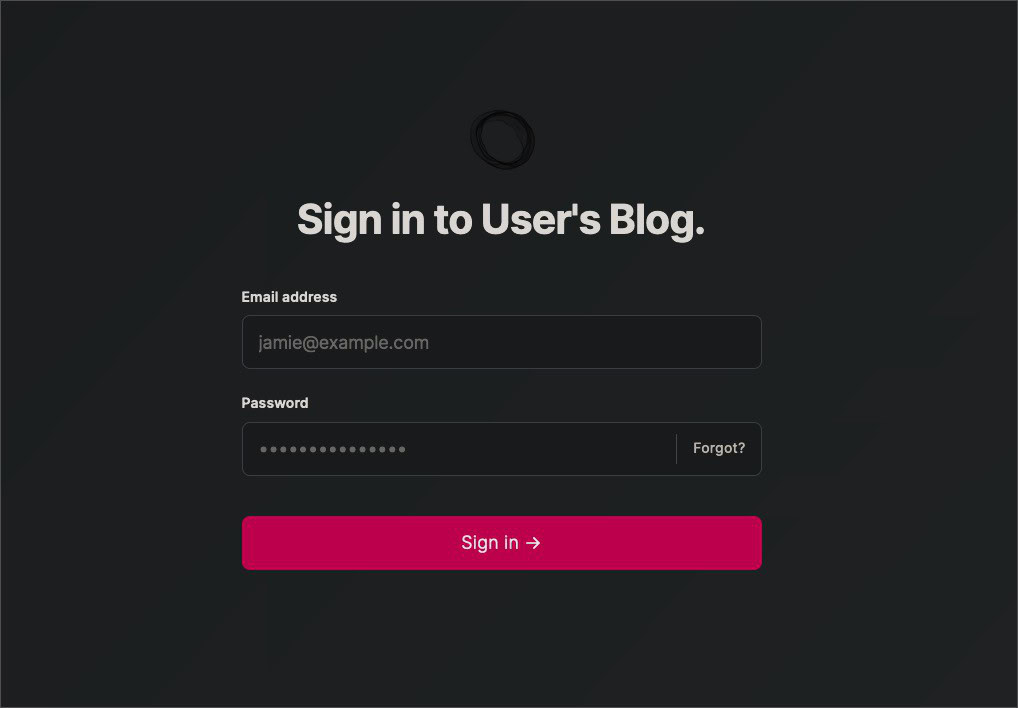
After login, create a sample blog post to verify the Velero backup and restoration on EBS volumes.

Now, let’s take a backup of this working application, including the Persistent Volumes attached to the MySQL database.
Backup the application
To take backup using Velero, execute the below command.
					> velero backup create ghost-backup
Backup request "ghost-backup" submitted successfully.
Run `velero backup describe ghost-backup` or `velero backup logs ghost-backup` for more details.
Let’s take a detailed look at the backup process using describe command.
> velero backup describe ghost-backup
Name: ghost-backup
Namespace: velero
Labels: velero.io/storage-location=default
Annotations: velero.io/source-cluster-k8s-gitversion=v1.24.13-eks-0a21954
velero.io/source-cluster-k8s-major-version=1
velero.io/source-cluster-k8s-minor-version=24+
Phase: Completed
Namespaces:
Included: *
Excluded: <none>
Resources:
Included: *
Excluded: <none>
Cluster-scoped: auto
Label selector: <none>
Storage Location: default
Velero-Native Snapshot PVs: auto
TTL: 720h0m0s
CSISnapshotTimeout: 10m0s
ItemOperationTimeout: 1h0m0s
Hooks: <none>
Backup Format Version: 1.1.0
Started: 2023-05-30 12:15:04 +0530 IST
Completed: 2023-05-30 12:15:13 +0530 IST
Expiration: 2023-06-29 12:15:04 +0530 IST
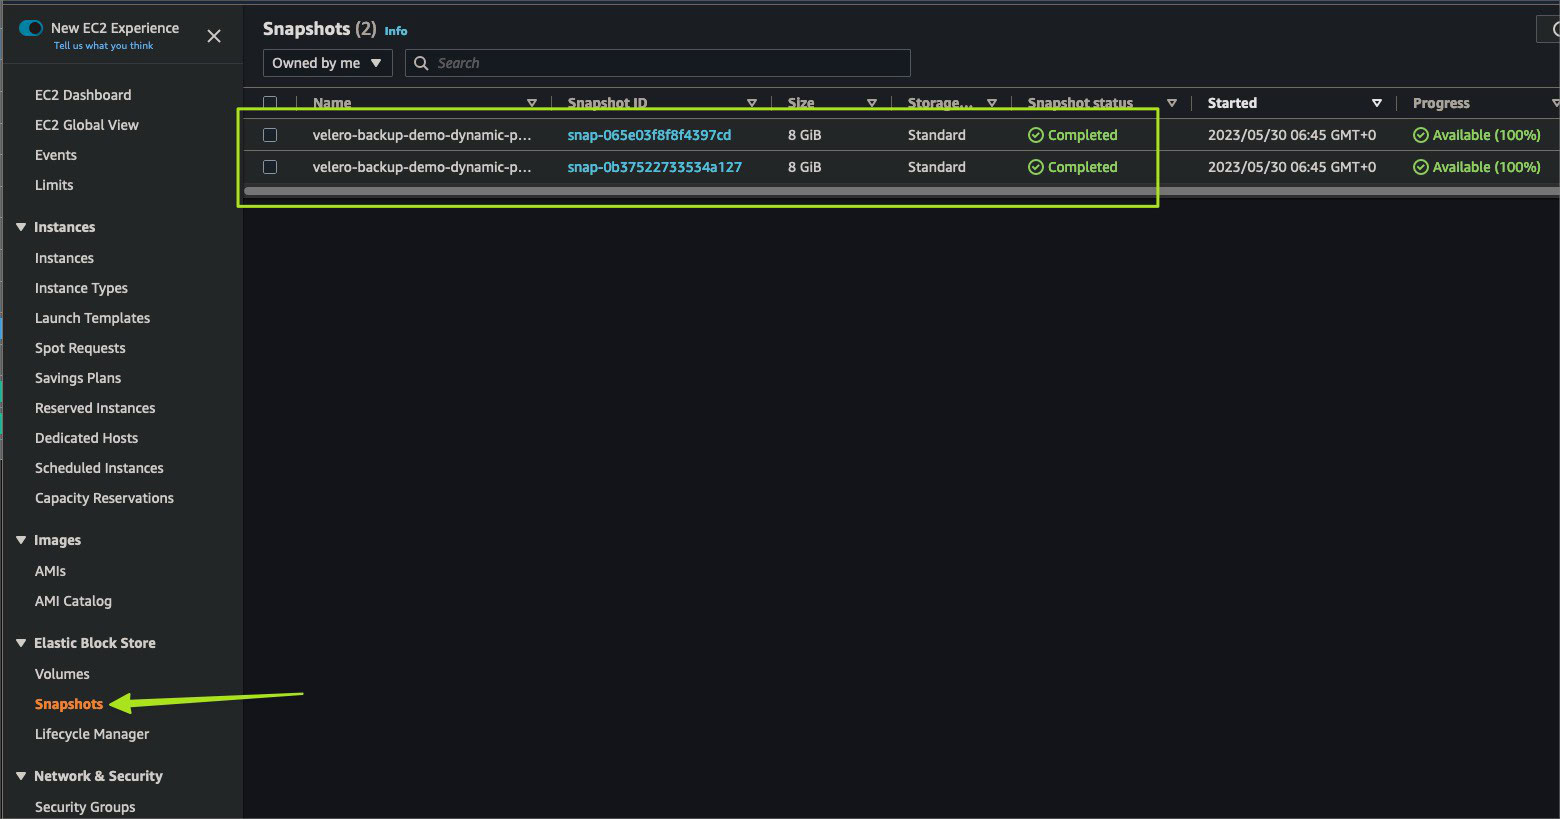
Velero-Native Snapshots: 2 of 2 snapshots completed successfully (specify --details for more information)
We can get the backup status by looking for Phase:Completed. Also, since the application uses EBS volumes as Persistent Storage, Velero has created EBS snapshots of those volumes.
We can check these snapshots in the AWS EC2 console.
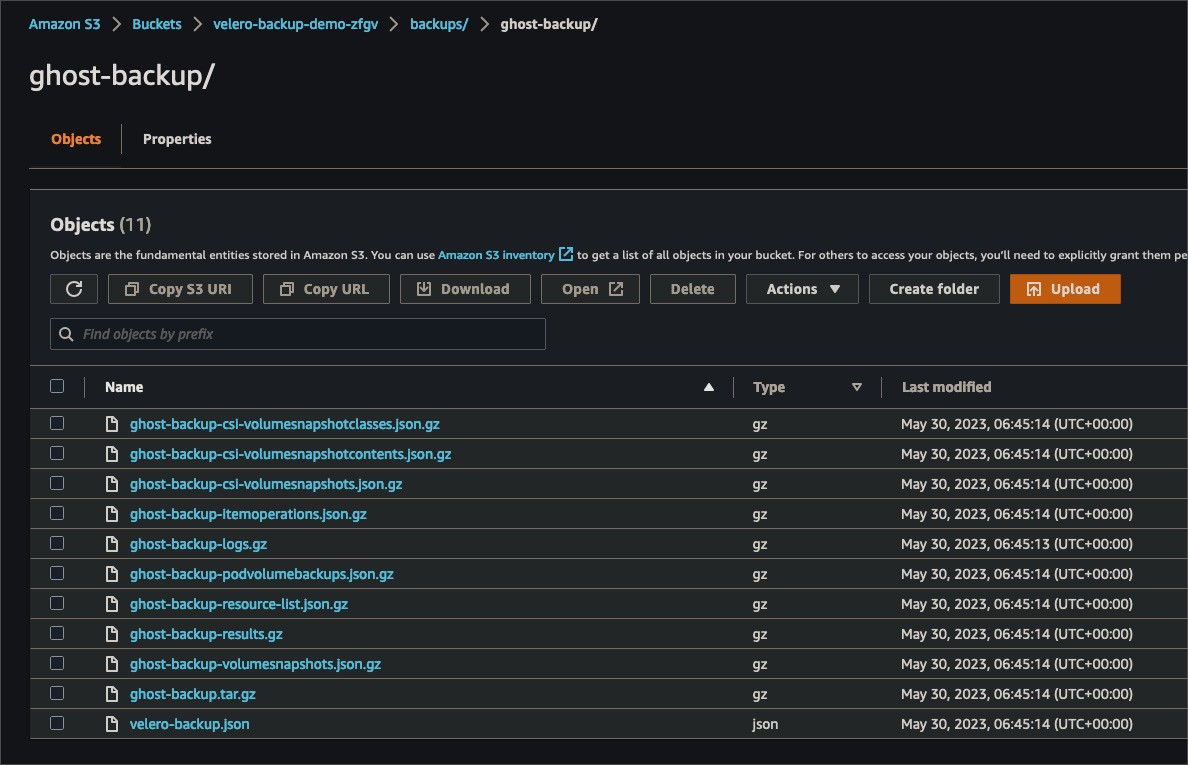
Also, let’s take a look at the S3 bucket objects. You should see the number of files in the S3 bucket.
Restore the application
To ensure a clean backup restore, uninstall the Ghost helm chart and delete all the application resources.
					> helm uninstall ghost --namespace ghost

release "ghost" uninstalled

> kubectl delete persistentvolumeclaim/data-ghost-mysql-0 -n ghost

persistentvolumeclaim "data-ghost-mysql-0" deleted
Now, to restore the backup, execute the below command.
					> velero restore create --from-backup ghost-backup --include-namespaces ghost

Restore request "ghost-backup-20230530123020" submitted successfully.
Run `velero restore describe ghost-backup-20230530123020` or `velero restore logs ghost-backup-20230530123020` for more details.
We can run the describe command and verify the restore status.
					> velero restore describe ghost-backup-20230530123020
Name:         ghost-backup-20230530123020
Namespace:    velero
Labels:
Annotations:

Phase:                       Completed
Total items to be restored:  28
Items restored:              28
Phase: Completed verifies the restore was successful.
Let’s access the Ghost URL and verify if the sample post is present. You can get the new URL using the below command.
> kubectl get svc --namespace ghost ghost --template "{{ range (index .status.loadBalancer.ingress 0) }}{{ . }}{{ end }}"
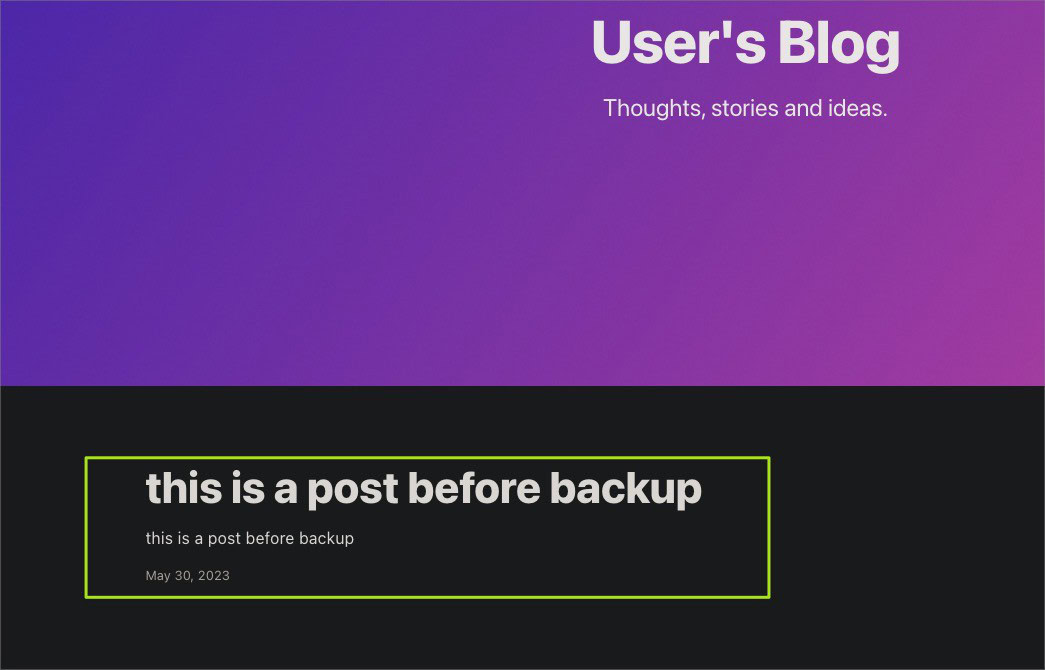
Indeed, the post is present.
Clean Up
To delete the resources and cluster, execute the below commands in series.
					# uninstall the ghost release from the ghost namespace
> helm uninstall ghost --namespace ghost
release "ghost" uninstalled

# deletes the PersistentVolumeClaim (PVC) named data-ghost-mysql-0 in the ghost namespace
> kubectl delete persistentvolumeclaim/data-ghost-mysql-0 -n ghost
persistentvolumeclaim "data-ghost-mysql-0" deleted

# deletes a backup named ghost-backup created by Velero
> velero backup delete ghost-backup
Are you sure you want to continue (Y/N)? Y
Request to delete backup "ghost-backup" submitted successfully.
The backup will be fully deleted after all associated data (disk snapshots, backup files, restores) are removed.

# removes all objects within the specified Amazon S3 bucket
> aws s3 rm s3://$BUCKET --recursive

# deletes the S3 bucket
> aws s3 rb s3://$BUCKET

# delete coredns and ebs-csi-controller deployments
> kubectl delete deploy coredns -n kube-system
> kubectl delete deploy ebs-csi-controller -n kube-system

# deletes the IAM service account
> eksctl delete iamserviceaccount \
--cluster=$CLUSTER \
--name=velero-backup-demo-server \
--namespace=velero

# delete the EKS cluster
> eksctl delete cluster -f cluster.yaml
Best practices for Kubernetes backup
We give five critical Kubernetes backup best practices so your application is always available and reliable.
1 Embrace Infrastructure as Code (IaC)
Adopting IaC practices is fundamental to modern backup strategies. Many organizations treat Kubernetes resources such as Deployments, Services, ConfigMaps, and Secrets as code and version control these resources in their source code repositories. This method ensures these Kubernetes resources are backed up and version-controlled alongside the application code.
Establishing such a practice where infrastructure configurations are committed to version control systems is advisable, providing a reliable backup and a history of changes.
2 Include All Necessary Resources
While transitioning to an IaC practice or as a safety net, ensure that your backup strategy includes all necessary resources critical to your operations. This includes application data, ConfigMaps, Secrets, PersistentVolumes, etc. Tailor your backup strategy to your data to ensure it’s appropriately protected.
Using Velero, you can select resources from the backups based on your requirements.
3 Regularly Execute and Validate Backup and Restore Processes
Implementing a regular schedule for your backups is essential in line with your data change rate and business requirements. But it’s equally essential to routinely exercise these backup and restore processes to verify Mean Time To Recovery (MTTR) and validate backup viability.
Testing these processes helps identify potential bottlenecks or issues that could delay recovery time and assures that the backups are reliable and restorable. Moreover, it gives an accurate recovery time estimate, helping set realistic expectations for disaster recovery scenarios.
You can use Velero to schedule backups regularly using the schedule backup feature.
4 Secure your backups
After the backup process, validate the data to ensure its integrity and reliability. This double-check mechanism guarantees that your data is safe and readily available when needed. Safeguard your backup data by ensuring it’s securely stored and encrypted. You add a layer of data protection by strictly controlling who can access backups. AWS offers various types of encryption for data storage, including S3 encryption and EBS encryption. This level of security is vital to protect sensitive information from unauthorized access.
5 Establish a retention policy
Establish a clear backup retention policy. This policy should specify the duration for which backups are retained and outline when old backups should be removed to conserve storage space. However, it’s crucial to retain sufficient old backups to meet your business or regulatory requirements. This balance helps keep your backup system efficient and compliant. Velero supports setting the retention periods for the backups.
6 Plan for recovery
Instituting a well-structured disaster recovery plan is a critical backup practice. This plan should clearly outline the steps for restoring from a backup, delegate responsibility for performing the recovery, and include guidelines for managing different failure scenarios. A comprehensive disaster recovery plan helps ensure a swift return to normalcy after a disruption.
Conclusion
Kubernetes has proven to be a stable and performant container orchestration platform over the years of battle testing in various environments. Today, it has become a synonym for container orchestration and management tools. Due to this popularity, Kubernetes is often their first choice when any organization needs to deploy its containerized applications. Kubernetes backups play an essential role in maintaining the availability and reliability of the applications.
In addition, implementing Infrastructure as Code (IaC) practices adds another dimension to Kubernetes backup strategies. Many organizations now treat Kubernetes resources, such as deployments and services, as code, storing them in source control repositories. This practice provides inherent backup and version control for these resources. Incorporating IaC into your backup strategy is recommended, treating the traditional backup method as a fallback plan.
Backing up Kubernetes goes beyond data to include workloads, networking resources, configurations, and storage. Given the continuous nature of the process, it is also essential to plan, secure, and systematically schedule backups. Tools like Velero can aid in performing comprehensive backups, thereby maintaining your Kubernetes environment’s optimal performance and availability.
